Whelp, my friend finished reading the Hunger Games, so as promised here are the dress sketches.
The first choice is a standard ball gown with pickups:
It’s a little different than my original concept, but it has the major bonus of having a pattern. This would save me hoooooooooours of work.
With the time saved from drafting an entire gown for each of them I’d be able to spend more time on tiny details added to the dress. Like possibly adding a corset closure up the back.
The second choice is this:
Which is really just a very bad drawing of this gorgeous dress I found many months back.
I love this dress. Hell, screw my bridesmaids, I want to wear this dress… but I don’t have a pattern for it. That means I’ll have to draft the entire thing from the ground up. I know it doesn’t seem like that big of a deal, but with my schedule over the next few months it’s got me in a panic.
I also originally wanted tartan fabric for the dresses, but after much scouring of the internet I’ve decided that @ 62$ a yard for tartan *** when I need 30+ yards *** my bridesmaids will look absolutely beautiful in a solid blue.
So, do you have any opinions about which way I should go?
Monday, February 20, 2012
Saturday, February 18, 2012
I swear I’m not a slacker!
I’ve just been sooooooooo busy. Sadly with my school, business, and wedding plans needing to take priority, the blog schedule will always be the first thing to slip. I will try and keep it going though ^_^.
So what has been monopolizing my time all week? Well as far as school and business I’ve:
- Studied for and taken three exams: Mathematical Statistics, Calculus 4, and Differential Equations.
- Met with an accountant to formalize my business. I’m officially INC now!
- Set up business bank accounts.
- Made two more microwave hand warmers. *** Sorry, no pictures ***
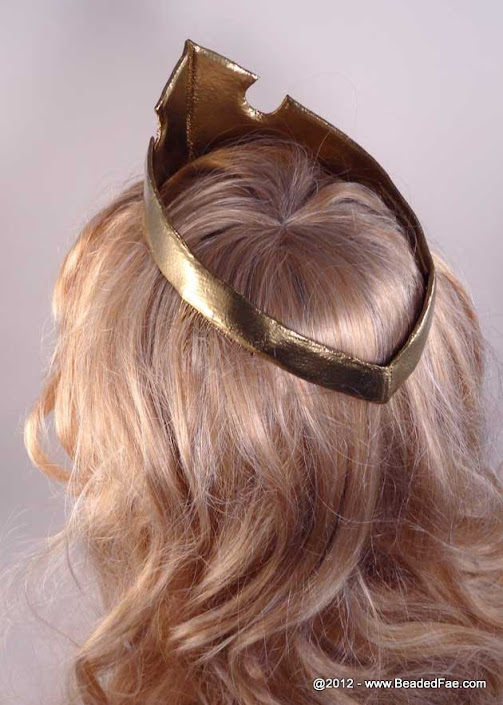
- Finished up and sent out a custom Aurora crown for a client on Etsy.
And for the wedding I’ve:
- Worked on the contract with the caterer.
- Made some progress on the ‘Save the Dates’. I’m not 100% complete, but I did sketch up this little guy really quick and I know he will an appearance somewhere on them.
- Cut out the corset patterns for my three bridesmaids.
- And finished the sketches of the dresses that they will wear. Now, normally I’d post a picture of the gowns here, but I’ve made a deal with one of my bridesmaids that I’d finish the sketches if she read half of The Hunger Games book. Since she hasn’t quite finished up her end of the bargain, they’re being held hostage for a few days ^_~.
See, I’ve been a busy girl! For now, it’s time for me to go visit JoAnns for some fabric and sew up these corsets. Hopefully I can get them all done this week so I can send them up to Kansas ASAP.
Sunday, February 12, 2012
Pink and Blue Sleeping Beauty Gown: Photoshoot
Click here for the making of the Sleeping Beauty Dress - Part 1
Click here for the making of the Sleeping Beauty Dress - Part 2
Click here for the making of the Sleeping Beauty Dress - Part 3
Click here for the making of the Sleeping Beauty Dress - Part 4
Click here for the making of the Sleeping Beauty Dress - Part 5
Wow, that hemming took me nearly three hours straight, but yaaaaay it was finally finished! And all of it in under a week! *** Granted it was nearly 10 hours a day, 6 days straight… but I was still proud. ***
Enough blabbering, now for what people really want; the photos!
First up is a shot of me and a couple of other Disney princesses at the New Years party the dress was made for.
I don’t know what it is about me and cameras, but I always tend to make a stupid face whenever someone snaps a shot. There are lots more pictures of me from the party… but none I really need to spread around the internet anymore than they already are ^_~.
So, in order to grab some shots where I wasn’t making goofy faces I drug my guy out a few weeks later for a diy photo shoot. This mostly involved us driving around town looking for pretty backdrops to shoot at. Here are a couple of those photos:
First we found a pretty lake with some swans.
And here is one with some thorn type bushes in the background.
While these were nice and all, we really hit gold with a super pretty church downtown.
And last but not least, my absolute favorite shot of the entire day….
The sun in my eyes was so painful, but I’m really glad Jason made me open them for this picture. It turned out to be really nice.
So that about wraps things up on this gown. It was a weeks worth of hard work, but turned out to be one of my favorite costumes to date. Sadly it will probably be the last costume I make for quite awhile. With my wedding coming up in May I need to start in on the bridesmaids dresses soon. Three full corsets, mockups, and gowns are sure to take quite a bit of time. But hey, they kinda count as costumes though, right?
Saturday, February 11, 2012
Making it fit for Princess Aurora
Click here for the Princess Aurora Dress - Part 1
Click here for the Princess Aurora Dress - Part 2
Click here for the Princess Aurora Dress - Part 3
Click here for the Princess Aurora Dress - Part 4
I know, I know, I’ve been a slacker. I’m trying really hard to keep to a two day update schedule, but sometimes life gets crazy busy. In order to make up for my breach of the schedule I’ll try to post the finished dress tomorrow. Now, onto the construction!
Since I couldn't find a pattern, or really even a good reference, I just free handed the collar and over skirt with some muslin until I was happy.
If you noticed, I did make a slight tweak from the reference picture in regards to the overskirt. In the movie the tri peaks were all connected as one skirt, but in execution this creates a bit of a problem. At what angle do you cut the skirt so that it has sufficient give for the hips, while at the same time fits snugly to the skirt? Plus, where would I add seams so I could create the splash effect? While that’s all technically doable, there wasn’t any real reason for it other than blind dedication to accuracy. *** I know, funny coming from me considering the fit I had about the Disney World collars *** In any case, I decided to stick with separate petals for the overskirt. I could argue that it was for unhindered movement, but really it just made my life easier.
Oh! You know how the other day I said no matter how many lists I made I still managed to find ways to screw up the little stuff? This over skirt was a perfect example. I sewed it together wrong not once, but twice! The first time was just me being silly and skipping a step by sewing the front and back together before I’d added the splashes… but the second time was far worse. I really wanted the overskirt and underskirts splashes to line up so I went through the tedious task of making sure every last swirl was right. Since I’d used the last of my pink polyester fabric for the actual gown lining, I had to use the light pink suede on both sides of the splash panel. This meant, unlike before where they were two different shades of pink, both the front and the back of the splash looked identical. I didn’t even think about it before I slapped the pink splashes on my blue panel and appliqued them on. It was so sad when I held my finished panel up to the dress and noticed the colors were all backwards.
Ah well, live and learn. They were relatively small pieces so it didn’t take to terribly long to make a new one. I made sure to quadruple check before I appliqued this time!
Even though I absolutely love the splashes on this dress, the detail I actually liked most was the collar; especially that it’s made in two different colors. In my research for this gown I found costume, after costume, after costume with white collars. And Disney itself was the main perpetrator of this error! Their massed produced pink gowns all had stark white collars. I don't understand why though, in the movie they were always either a light blue or pink. It's not like it would have cost anymore to put light pink on their sewing lines... /shrugs.
Any who, back to the dress. I was almost done! Sadly the next step was my second least favorite thing to do in the whole wide world! Zipper basting.
Really any kind of basting is horrible in my book. It seems so utterly pointless to put in a bunch of stitches you know you’re going to take right back out again! I suppose it’s a necessary evil though.
The zipper and I had some disagreements when it came to this dress. I’d changed the location and put it up the pink side seam instead of the back due to the splashes, but it was not happy about the joint where the bodice meet the over skirt and underskirt. After a firm talking to, and some deftly utilized scissors on some seam allowances, it finally decided to behave.
So with that out of the way I just needed to add some extra last minute splashes, insert the lining, and then do my absolute least favorite sewing duty; hemming. Uggggh. Ball gowns of this size are just sooooo big, so hemming seems to take forever and five days!
This was about the time I started whining to Jason, ‘Can’t I just go as Mickey… I don’t have to hem a gown to be Mickey.’ Since he’d been practically abandoned for the past 6 days while I sewed this gown he flately refused and told me I had to be Aurora. *** With malicious glee in his eyes I might add *** Bah!...
To be continued…
Click here for the Princess Aurora Dress - Part 6
~~~~
Is there a sewing task that you absolutely hate doing like hemming?
Wednesday, February 8, 2012
Sleeping Beauty Dress: The Skirt
Click here for Sleeping Beauty's Pink and Blue Gown - Part 1
Click here for Sleeping Beauty's Pink and Blue Gown - Part 2
Click here for Sleeping Beauty's Pink and Blue Gown - Part 3
Now that I was practically finished with the bodice panels, it was time to lay out the skirt front and back. If I thought the bodice was a lot of work, I was sure in for a rude awakening.
After pinning my two front pink pieces together, I quickly free handed some waves with fabric chalk. *** I <3 fabric chalk. When you mess up, you can just wash it away! ***
Oye vey, I should have realized by the sheer size of the panel that I’d be in for hours of pinning. Between the four applique panels I used three entire boxes of fabric pins!
Next it was time for hours upon hours... upon hours... of applique. Oh how I missed using my industrial machine! This process definitely opened my eyes to the dedication of quilters. I'd have gone crazy if it weren't for my audio book in the background.
Front, Back, Front, Left, Right, Front, Back, Front, Left, Right, Front…..
Once I finished with the tedium of applique, it was finally time to add some Sleeping Beauty flair to my gown!
Click here for Sleeping Beauty's Pink and Blue Gown - Part 5
Click here for Sleeping Beauty's Pink and Blue Gown - Part 6
~~~~~~~~~
Oh! While I’m thinking about it, is there anyway to avoid stabbing yourself with pins when you’re sewing?!? I think I must have stuck myself upwards of 300 times sewing these skirts together. My poor hands were in revolt for a week!
Monday, February 6, 2012
Princes Aurora’s Pink and Blue Gown – The Construction: Splish Splash
Click here for Sleeping Beauty's Pink and Blue Splashed Dress - Part 1
Click here for Sleeping Beauty's Pink and Blue Splashed Dress - Part 2
Okay, you know how I said I only had a week to make a full ball gown? Well, that was a total lie. I only had a week to make three ball gowns! Here, let me explain.
To make the two toned splash effect for this dress I had to make a base dress (half blue and half pink) plus the outer dress that would be in the opposite colors. Because I demanded quality out of this garment ***no shortcuts allowed even on a time crunch!*** I had to make a backing for the outer dress so when I turned it into splashes it wouldn’t fray along they edges. This brings the total to three.
I could probably try and get technical and say that I made the gown a fourth time to line it, but since I’d have done that regardless of the outer design I’ll just stick with three.
And my friends say I’m lazy… pfft.
Even though I didn’t start this dress until a week before the event, I knew I wanted to make the Sleeping Beauty dress ever since the New Years theme was announced back in September. Because of this I’d been keeping my eye out for fabrics over the previous few months. I thought I had struck pay dirt on one of my trips to Kansas where I found a gorgeous micro suede fabric in both pink and blue. Thinking it would make for an amazing bodice, I scoured the store for other fabrics that would compliment those tones and loaded up my cart. However, when lady at the cutting counter began unrolling the 8 yards of pink I’d need, we discovered that the bolt was actually just a collection of remnants… and they weren’t even from the same dye lot! Ugh! I was heartbroken. I knew the dress needed complimentary fabrics and tones or it would clash, and a patchwork of 5 different colored pinks just wouldn't do. Reluctantly I put everything back and went home empty handed.
*** Have ya’ll begun to notice a trend? I always seem to have trouble finding fabrics! Even though I know exactly what I want the stores never seem to carry it. I wonder if this is common problem for other people too. Hmm….***
Any who, I kept looking for fabrics for the next few weeks with no luck. It was getting closer and closer to go time, so I needed to find something soon. Before sucking it up and calling the company to rush order entire bolts, I decided to drive the hour south to Moore to take a chance on their fabric stores. As luck would have it they had almost the same exact fabric I wanted in the first place. Yay!
There was one little problem though. In the entire store there were no lighter pink and blue fabrics in the same tone. ***insert eye twitch here*** Okay, fine. The fabric gods have obviously deemed that I was not allowed to have a micro suede bodice for this gown. But I wasn’t going to let them have the last laugh. The back side of the micro suede fabrics were beautiful shades of pink in blue in just a few steps deeper than the front. I’d simply flip my original plan! Now the sleeves and flouncy overskirt would be made with the micro suede, and for the bodice and main skirt I’d just flip the fabric over.
See, I can be flexible. ***Sticks tongue out at the fabric gods***
So, now that I had my fabric purchased (all 24 yards of it @_@), I finally got started on the splash panels.
I’m not exactly sure if I can articulate how the splash panels were made. A vague overview would be that I started with two layers of each panel, one the outer fabric and one a thinner lining fabric. After drawing some freehand splashes, I ran over the drawn lines with a straight stitch on my machine, flipped the fabric right side out, and then ironed it flat.
Hopefully that made sense. Perhaps one day I can make a video for the technique.
Once I finished each of the splash panels they were pinned onto their bases where they awaited their impending applique stitch!
Soooooo many needles. And this bodice was only 14 inches tallish? Just wait til you see the skirt!
Do you see my cute little cheat sheet up there? I was so of proud of it. In order to prevent myself from messing up, I wrote a list of every pattern piece, right side or wrong side, that I needed to cut out and in which color. It seems kind of OCD, but it was actually a huge helper. It’s super easy to cut out the wrong color or pattern side when you’re making a dress that is half one color and half another!
To be continued...
~~~
Do you have any tips for keeping your sewing projects organized? Even with my many lists I still sometimes find myself making tiny mistakes!
Click here for Sleeping Beauty's Pink and Blue Splashed Dress - Part 4
Click here for Sleeping Beauty's Pink and Blue Splashed Dress - Part 5
Click here for Sleeping Beauty's Pink and Blue Splashed Dress - Part 6
Saturday, February 4, 2012
Princess Aurora’s Pink and Blue Gown - The Plan
Click here for Princess Aurora's Pink and Blue Gown - Part 1
Like most of my projects lately, I found myself on a crazy tight time schedule when making the Sleeping Beauty dress. I swear I’m not a procrastinator! Well… that’s a lie, I’m a horrible procrastinator. Even so, I’m also suuuuuuper busy all the time. From early Nov. straight through mid Jan. I spent almost every day in front of the sewing machine for at least 8 hours. Throw in the two trips to Kansas City, two family holidays, a craft show, and four finals all in this same time period I’m surprised I got anything done at all! With everything on my plate I only had the week between Christmas and New Years to get this dress ready for the party. A full ball gown in a week?… Pfft, no problem. School was out, I could totally do this /flexes.
In typical me fashion, I started by obsessing over the design concept. I know that I technically had a print out of the exact gown I wanted to make from the movie still, but there were things that I still needed to work out. Like how I wanted to go about making the overskirt, collar, and splashed designs.
For full disclosures sake, I should probably let you know that I started with Butterick Pattern 4453 as a base. It was a pattern I found in my stash, but it’s discontinued now.
It had the right basic shape and feel for the dress I wanted, but I had to alter it a ton to get the desired finished pattern. I think the only pieces I didn’t alter, tweak, or completely change were the two side panels of the skirt. Even then I should have added pockets! ***Why oh why do I always forget to add pockets ***
So, I started scouring the internet for ideas… Do you know how many really ugly adult Princess Aurora dresses there are out there? It’s really quite astounding.
I suppose that’s unfair. A lot of the cosplay dresses people created were really cute, but the official Disney Land/Disney World dresses were so obnoxious and weird. The ‘collar’ of the dress wasn’t even sitting on the shoulders where it was supposed to be.
See? Weird. It vaguely looks the same, but at the same time is totally unflattering and odd. And to top it off this was one of the only official blue dresses I could even find to compare directly with the original; almost all of them are Pink! I couldn't find a single one that resembled the splashed dress I was planning on making.
/sigh. I decided instead of looking at reference pictures from what other people had made, I’d simply wing it. Worst case scenario, I’d totally botch the whole dress and just wear mickey mouse ears to the party. No one would ever have to know.
I set about making my under corset and mockup of the bodice, which took about two days. I almost skipped making a mockup due to the time crunch, but I’m soooo glad I didn’t. With the under corset on, the original pattern had to be taken in and altered all over the place. Because of the way I planed to make the splashes there would have been practically no way to do this post construction, so my extra few hours of work saved me a lot of grief. I’m almost positive there would have been tears if I’d made the gown straight from the original pattern. Lesson of the day: Always make a mock-up!
With the fitting completed it was time to start sewing the actual dress…
Click here for Princess Aurora's Pink and Blue Gown - Part 3
Click here for Princess Aurora's Pink and Blue Gown - Part 4
Click here for Princess Aurora's Pink and Blue Gown - Part 5
Click here for Princess Aurora's Pink and Blue Gown - Part 6
~~~
What do you think of the Disney World dresses? Am I just crazy, or do you think they look slightly weird too?
Thursday, February 2, 2012
A Disney New Years
I’m baaaaaaaack.
The trip to Breckenridge was absolutely amazing and so much fun. There was skiing, snowmobiling, pottery making, and even a wedding! However, now that I’m back I’m realizing just how far behind I am in mundane responsibilities, like school *mutters*. Because of this, it will likely be a few days before I dive into a new project.
There is good news though. You see, this leaves me more than enough time to make posts for one of my favorite costumes of all time, my Sleeping Beauty dress!
Every year my best friends throw an amazing New Years party and each time there is a new theme. Once it was 80s, another it was fancy cocktail attire, but this year it was going to be Disney! How much fun is that? Even though I had a million ideas rolling around in my head, from the carpet in Aladdin to the feather duster in Beauty and the Beast, there was never any doubt in my mind as to what my costume would be: Princess Aurora. *** The one character where naps are perfectly acceptable as role playing! ***
One of my moms favorite Disney movies of all time has got to be Sleeping Beauty. *** I remember it being played in our house A LOT growing up.*** As a kid, she even made me a blue sleeping beauty dress for Halloween one year. However, as I researched the gown for this party I started to notice a disturbing trend when it comes to Aurora’s attire. When exactly did she become a pink princess?!?!?
As most of you know, in the movie there is a great faerie fight between Flora and Merryweather over whether the dress should be pink or blue. They bicker and change the dress back and forth with magic over and over, making it one of the most memorable parts of the story. However, having seen the film about 100 bazillion times I clearly remember her birthday dress being blue for about 95% of the movie. Despite this, you can’t find the blue dress anywhere nowadays! From books to cartoons, to even costume stores and DisneyLand it is now a strictly pink dress. It’s as if the blue gown never existed!
There are many debates and explanations online as to why Disney has decided to shun Aurora’s blue dress; it usually comes down to their need to distinguish her from Cinderella, as they both have blonde hair. Let me tell you though, it is an absolute outrage in my eyes. So, I decided that when making my New Years costume I would not bow to Disney’s pink princess ploy. She was not pink darnit! But….. I also determined that I wouldn’t make a strictly blue dress either, since she wasn't only blue.
Instead I would make, by far, the best dress in the whole movie. The one that immediately sprang to mind every time I thought of Sleeping Beauty.
Yes, I know. Aurora never technically wore this dress. But who cares! It was one of the best scenes in the whole movie and definitely memorable. Plus, it reminds us that Sleeping Beauty was not strictly pink nor blue. She was both.
Take that Disney!
Click here for Sleeping Beauty's Pink and Blue Splashed Dress - Part 2
Click here for Sleeping Beauty's Pink and Blue Splashed Dress - Part 3
Click here for Sleeping Beauty's Pink and Blue Splashed Dress - Part 4
Click here for Sleeping Beauty's Pink and Blue Splashed Dress - Part 5
Click here for Sleeping Beauty's Pink and Blue Splashed Dress - Part 6
Do you have a favorite color gown? It’s alright if it’s pink, I promise I won’t bite your head off ^_~.
The trip to Breckenridge was absolutely amazing and so much fun. There was skiing, snowmobiling, pottery making, and even a wedding! However, now that I’m back I’m realizing just how far behind I am in mundane responsibilities, like school *mutters*. Because of this, it will likely be a few days before I dive into a new project.
There is good news though. You see, this leaves me more than enough time to make posts for one of my favorite costumes of all time, my Sleeping Beauty dress!
Every year my best friends throw an amazing New Years party and each time there is a new theme. Once it was 80s, another it was fancy cocktail attire, but this year it was going to be Disney! How much fun is that? Even though I had a million ideas rolling around in my head, from the carpet in Aladdin to the feather duster in Beauty and the Beast, there was never any doubt in my mind as to what my costume would be: Princess Aurora. *** The one character where naps are perfectly acceptable as role playing! ***
One of my moms favorite Disney movies of all time has got to be Sleeping Beauty. *** I remember it being played in our house A LOT growing up.*** As a kid, she even made me a blue sleeping beauty dress for Halloween one year. However, as I researched the gown for this party I started to notice a disturbing trend when it comes to Aurora’s attire. When exactly did she become a pink princess?!?!?
As most of you know, in the movie there is a great faerie fight between Flora and Merryweather over whether the dress should be pink or blue. They bicker and change the dress back and forth with magic over and over, making it one of the most memorable parts of the story. However, having seen the film about 100 bazillion times I clearly remember her birthday dress being blue for about 95% of the movie. Despite this, you can’t find the blue dress anywhere nowadays! From books to cartoons, to even costume stores and DisneyLand it is now a strictly pink dress. It’s as if the blue gown never existed!
There are many debates and explanations online as to why Disney has decided to shun Aurora’s blue dress; it usually comes down to their need to distinguish her from Cinderella, as they both have blonde hair. Let me tell you though, it is an absolute outrage in my eyes. So, I decided that when making my New Years costume I would not bow to Disney’s pink princess ploy. She was not pink darnit! But….. I also determined that I wouldn’t make a strictly blue dress either, since she wasn't only blue.
Instead I would make, by far, the best dress in the whole movie. The one that immediately sprang to mind every time I thought of Sleeping Beauty.
The pink and blue splashed dress from the cabin scene!
Yes, I know. Aurora never technically wore this dress. But who cares! It was one of the best scenes in the whole movie and definitely memorable. Plus, it reminds us that Sleeping Beauty was not strictly pink nor blue. She was both.
Take that Disney!
Click here for Sleeping Beauty's Pink and Blue Splashed Dress - Part 2
Click here for Sleeping Beauty's Pink and Blue Splashed Dress - Part 3
Click here for Sleeping Beauty's Pink and Blue Splashed Dress - Part 4
Click here for Sleeping Beauty's Pink and Blue Splashed Dress - Part 5
Click here for Sleeping Beauty's Pink and Blue Splashed Dress - Part 6
~~~~~
Subscribe to:
Posts (Atom)